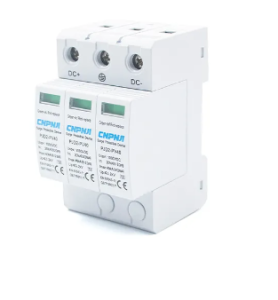
The work of an isolator switch for PV installation involves detailed attention and adherence to safety standards for the effective isolation of DC circuits within a PV system. Disconnect all power supplies before commencing and ensure that the PV system is at a complete de-energized state. This is an important safety precautionary measure, as solar arrays can function at very high voltages-some commercial setups have reached up to 1500V and can pose very serious risks if not handled with due care.
Choose the site of the PV isolator switch to be the one that would offer easy access should there be a need for maintenance or an emergency, and it is normally located near the inverter. The normal ratings for isolator switches used in most systems are within the range of 600V to 1500V, and the current rating ranges to around 20-40 amps for residential or smaller installations, though it may go as high as 100 amps in bigger systems. Ensure the rating of the switch corresponds with the specifications of the inverter and PV array in order not to invite system failure or safety hazards due to overloads.
Mount the switch securely, in accordance with the installation instruction provided by the manufacturer. For outdoor installations, switches shall at least be IP66-rated to enable protection against dust and water. IP67-rated isolator switch is preferred since it offers durability if the system is exposed to extreme weather conditions. Attach the isolator switch on a non-combustible surface in such a manner that the mounting height is accessible on many occasions. For example, the NEC recommends that disconnects be installed at a readily accessible height, about 4 to 6 feet, for safe access.

Connect the DC cables from the PV array to the input terminals of the isolator switch, carefully matching the positive and negative terminals to avoid any short circuits. Rated DC cables of appropriate size for the maximum current that may be expected from the PV system should be used to avoid losses in efficiency and overheating. Next, the switch output terminals should be connected to the inverter. Check each connection carefully, as incorrect wiring can lead to voltage drops or damage to the equipment.
Once put into place, test the PV isolator switch to confirm it effectively disconnects the power between the panels and the inverter. This ensures that the system can be safely isolated when needed. For large commercial systems, it is recommended to periodically test isolator switches for performance and compliance in response to long-term safety.
A better-quality PV Isolator Switch fitted that meets voltage and environmental demands of the system contributes more toward safety and protects equipment and personnel. Installation and testing are considered the two most vital and integral parts of any solar power system.